SSH Access
SSH access allows you to securely connect to your spaces for advanced management and development. This guide explains how to set up SSH keys, connect via SSH, and simplify connections using .ssh/config.
Adding Authorized SSH Keys
-
Click your username in the top-right corner of the web interface and select
My Profile. -
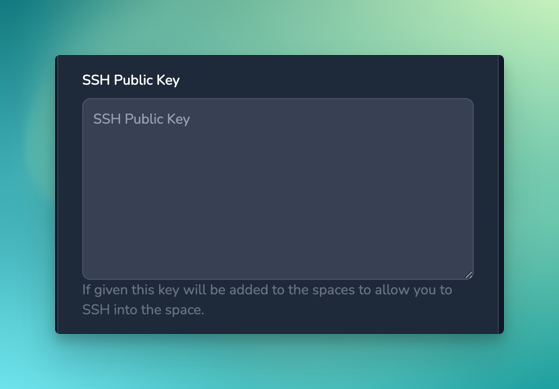
Paste your public SSH key into the
SSH Authorized Keysfield and clickUpdate.- You can add multiple public keys by placing each key on its own line.
- All listed keys will be used for your SSH-enabled spaces, enabling passwordless authentication from any matching private key.
SSH Authorized Keys
-
Alternatively, automatically fetch your public keys from GitHub by entering your GitHub username in the
GitHub Usernamefield.
When using the SSH server built into the knot agent, the keys are stored in the agent’s memory. When using an SSH server within the space, the keys are written to ~/.ssh/authorized_keys, one key per line. Profile key changes are also pushed to running SSH-enabled spaces.
Adding a Private SSH Key
You can also add an SSH private key to your own profile. It is not shown when administrators edit other users. The private key is always taken from the current space owner’s profile and is applied every time a space starts.
When set, knot writes it to the appropriate file in ~/.ssh/ depending on the key format:
| Key Format | File |
|---|---|
| OpenSSH (Ed25519) | ~/.ssh/id_ed25519 |
| RSA | ~/.ssh/id_rsa |
| EC | ~/.ssh/id_ecdsa |
Switching key formats (for example from RSA to Ed25519) automatically removes the old key file so only the current key remains.
The private key belongs to the space owner only. If a space is shared, shared users’ public keys are added for login access, but their private keys are not copied into the owner’s space.
If the owner has no private key set in their profile, any previously written key file is removed from the space on next start. This ensures that transferring a space to a new owner does not leave the previous owner’s private key behind.
Connecting via SSH
Step 1: Connect to the knot Server
-
Ensure the knot client is installed on your local machine.
-
Open a terminal and run the following command, replacing the URL with your knot server’s address:
knot connect https://knot.internal:3000 -
Enter your username and password when prompted.
-
The generated access key will be stored in
~/.config/knot/knot.ymlfor future use.
Step 2: Open an SSH Connection
-
Use the following command to connect to a space (e.g.,
phptest), replacinguserwith your username:ssh -o ProxyCommand='knot forward ssh %h' -o StrictHostKeyChecking=no user@phptest -
This will open an SSH session to the space, functioning like any other SSH connection.
Simplifying Connections with .ssh/config
To streamline SSH connections, add the following configuration to your local machine’s .ssh/config file:
Host knot.phptest
  HostName knot.phptest
  StrictHostKeyChecking=no
  LogLevel ERROR
  UserKnownHostsFile=/dev/null
  ProxyCommand knot forward ssh phptest
Once added, you can connect to the space with a shorter command:
ssh user@phptestAutomating .ssh/config Updates
The knot client includes a helper function to manage .ssh/config entries for all your spaces:
-
Add entries for all spaces:
knot ssh-config update -
Remove all entries:
knot ssh-config remove
Enabling Agent Forwarding
Agent forwarding allows you to use SSH keys from your local machine within the space. To enable it, add the -A option to your SSH command:
ssh -A user@phptestManaging SSH Keys
-
View exported keys:
ssh-add -L -
Add a key:
ssh-add YOUR-KEY
Persistent Keys on macOS
On macOS, the ssh-agent forgets keys after a restart. To persist keys in the keychain, use the --apple-use-keychain option:
ssh-add --apple-use-keychain ~/.ssh/id_rsa